What's the Best Way to Store Cassette Tapes for Long-Term Preservation?

This guide covers everything you need to know about storing cassette tapes properly—from shelf orientation and temperature control to case selection and handling habits that prevent irreversible damage. Whether you're sitting on a collection of five hundred tapes or just inherited your uncle's prog-rock stash, these practices will keep your magnetic media playable for decades.
Why Does Tape Storage Orientation Matter?
Here's something most collectors learn the hard way: cassettes hate being stored vertically. When you stand a tape on its spine—like books on a shelf—the tape pack inside shifts downward over time, creating uneven wind tension. That uneven tension leads to "edge curling" and can cause the tape to scrape against the shell when played.
The correct approach? Store your cassettes horizontally, wound side down. This keeps the tape pack evenly distributed across the reel hubs. Think of it like storing vinyl records flat rather than leaning—gravity works against you when things are vertical. For reference, the Library of Congress preservation guidelines recommend horizontal storage for all magnetic tape formats, including cassettes.
If you're short on space and must store vertically, make sure the tapes are fully wound to one side—preferably the take-up reel—and check them every few months. Rotate them occasionally. It's not ideal, but it's better than letting them sit half-wound on a vertical shelf for years.
What Temperature and Humidity Will Destroy Your Tapes?
Magnetic tape is surprisingly picky about its environment. The binder that holds magnetic oxide particles to the polyester base film absorbs moisture from the air. Too much humidity—above 60% relative humidity—and that binder gets sticky. Sticky binder syndrome (technically called "soft binder syndrome") causes tapes to squeal, shed oxide, and potentially jam in your deck.
Too dry isn't great either. Below 20% humidity can make the binder brittle and prone to cracking. The sweet spot sits between 40% and 50% relative humidity, with temperatures around 65-70°F (18-21°C). Basements and attics are typically terrible choices—basements for dampness, attics for heat cycling.
Heat is the silent killer here. Every 10°F increase above room temperature roughly doubles the rate of chemical degradation. A tape stored at 90°F degrades four times faster than one at 70°F. Those garage storage boxes? They're cooking your collection. The Institute of Museum and Library Services provides excellent resources on climate control for personal media collections if you want to dig deeper into environmental management.
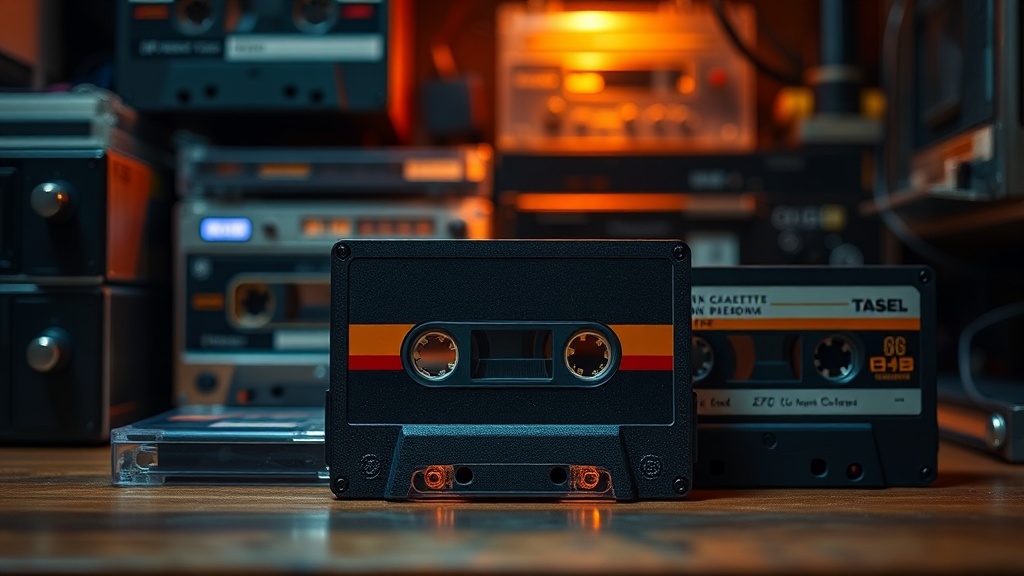
Should You Keep Tapes in Their Original Cases?
Short answer: absolutely. Those plastic Norelco cases weren't just marketing—they're engineered protection. The hard shell shields against physical impact, dust infiltration, and light exposure. UV light specifically degrades the plastic cassette shell itself, making it brittle and yellow over time.
That said, not all cases are created equal. The soft "slipcase" style common with 90s releases offers minimal protection. If you have valuable tapes in these flimsy wrappers, consider upgrading to aftermarket hard cases. They're inexpensive—usually under a dollar each when bought in bulk—and worth every penny for rare or out-of-print releases.
One often-overlooked detail: case cleanliness. Dirty cases grind dust against tape shells every time you open them. Wipe cases with a slightly damp microfiber cloth before shelving. Let them dry completely—trapped moisture is worse than surface dust.
For storage boxes themselves, avoid cardboard. It off-gases acids over time and offers zero moisture barrier. Plastic storage totes with tight-fitting lids work better, though make sure they're "archival safe" polypropylene—not PVC, which can outgas chemicals that attack tape binders. The Society of American Archivists has published guidance on selecting appropriate storage containers for magnetic media.
How Often Should You Exercise Your Cassette Collection?
Here's a counterintuitive truth: tapes stored untouched for years often play worse than those played regularly. The magnetic particles settle, the lubricants in the binder dry unevenly, and the tape can develop "print-through"—where magnetic patterns from one layer imprint on adjacent layers.
The solution? Exercise your tapes. Once or twice a year, fast-forward and rewind each tape from end to end. This redistributes lubricants, evens out the tape pack, and refreshes the magnetic alignment. It's like starting a classic car periodically—things seize up when they sit too still.
Don't just fast-forward blindly, though. Use a tape deck you trust, one with clean heads and proper tape tension. A poorly maintained deck can do more harm than good during this exercise routine. If you hear squealing, stop immediately—that's sticky shed syndrome, and you need to address it before the tape destroys itself.
What About Mold and Physical Damage?
Mold on cassettes looks like white, green, or black fuzzy patches on the tape surface or inside the shell. It spreads fast in humid conditions and can permanently damage both the tape and any deck you play it in. The spores get into capstans, heads, and pinch rollers—then transfer to every subsequent tape you play.
Never play a moldy tape. Clean it first, or accept the loss. Cleaning requires unwinding the tape in a clean environment (not your living room), wiping the oxide surface with a soft cloth and high-purity isopropyl alcohol, and respooling carefully. Most collectors send severely moldy tapes to professional restoration services—it's tedious, precise work that requires specialized equipment.
Physical damage—cracked shells, missing pressure pads, broken leaders—is easier to address. Replacement shells are available from specialty suppliers, and leader splicing (using proper splicing tape, not Scotch tape) can rescue tapes with broken ends. Keep a few donor cassettes around for parts. Type I ferric tapes in common shells make excellent donors for valuable recordings in damaged housings.
Building Your Storage System
Start with an inventory. Know what you have before designing storage. Spreadsheets work, but even a photo catalog on your phone helps. Group tapes by value, rarity, or play frequency—your most-played tapes should be most accessible.
Invest in a hygrometer for your storage area. They're cheap—under $15—and tell you whether you need a dehumidifier or humidifier. Small desiccant packs in storage boxes help, but they're temporary solutions, not climate control. Replace them regularly or get rechargeable silica gel canisters.
Label everything clearly. Masking tape on case spines works in a pinch, but printed labels last longer. Avoid adhesive labels directly on cassette shells—they leave residue that gums up decks and becomes permanent over time.
Finally, accept that perfect preservation isn't free. Good cases, proper shelving, climate control—it's an investment. But spread across a collection of hundreds of tapes, the per-tape cost is minimal. Compare it to replacing a single rare live recording or out-of-print demo, and the math becomes obvious.
"The tapes you store properly today are the ones that'll still play in twenty years. The ones you toss in a garage box? They'll be unspooling Christmas ribbon by 2035." — Soren Fernandez