How to Photograph Your Cassette Collection for Insurance and Resale

You've spent years tracking down that sealed Thriller release, the rare Type IV metal tape demo, and the Sony Walkman Professional in mint condition. Then a pipe bursts, or your apartment gets broken into, or a buyer disputes the condition of a tape you sold. Without photographic evidence, your insurance claim falls flat—or you eat the cost of a refund you didn't deserve. Proper documentation isn't paranoid; it's the difference between proving what you own and watching your investment vanish into "he said, she said."
This guide covers exactly how to shoot your cassettes, reels, and deck hardware so the images hold up to scrutiny. Whether you're building a catalog for your own records, preparing eBay listings, or submitting documentation to your insurer, these techniques will give you clean, accurate photos that tell the truth about your collection's condition.
What lighting setup prevents glare on cassette cases?
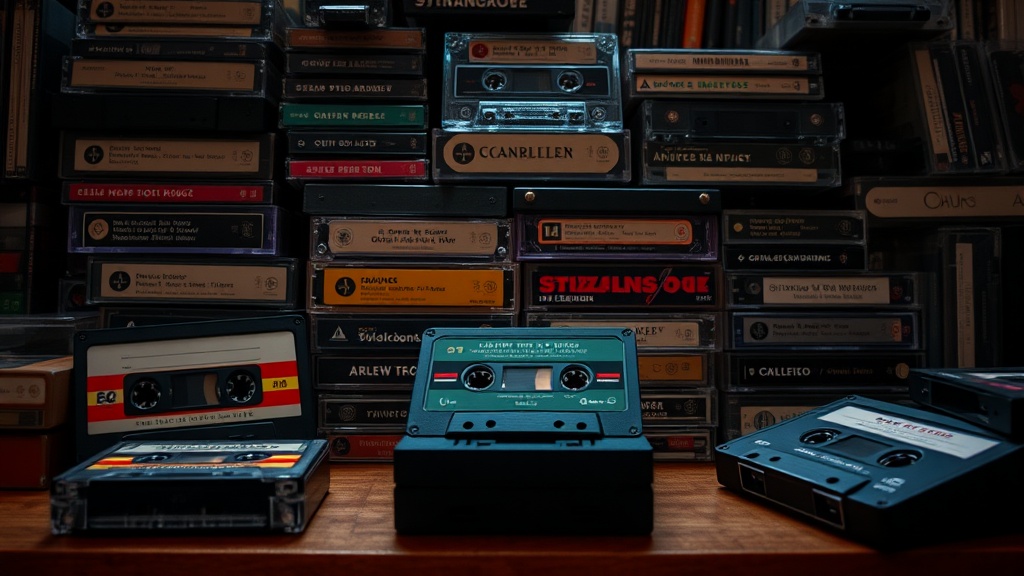
Plastic jewel cases and glossy J-cards are mirrors with delusions of modesty. Point a flash at them dead-on and you'll blow out half the image. I've seen collectors try to fix this in post-processing—don't. Get it right in-camera.
Use diffuse, continuous lighting. Two adjustable LED panels set at roughly 45-degree angles to your subject will wrap light around the case without creating hot spots. If you're on a budget, a $20 collapsible light tent from Amazon works surprisingly well. The white fabric diffuses ambient light and eliminates most reflections. For larger items like boomboxes or component decks, hang a white bedsheet between your subject and the window, or shoot on an overcast day when the clouds act as a massive softbox.
Color temperature matters. Tungsten bulbs (warm/orange) and daylight (cool/blue) don't mix well. Stick to daylight-balanced LEDs rated 5000K-5500K, or shoot near a north-facing window. Mixing sources creates color casts that make clear tape shells look yellow or J-card blues turn muddy. Your camera's auto-white balance will struggle—set it manually if your gear allows.
Avoid flash unless you know how to bounce it. Direct flash creates that ugly bright spot in the center of the case and throws harsh shadows behind the tape. If you must use flash, bounce it off a white ceiling or wall, or use a diffuser. Even a piece of white printer paper taped over the flash head helps.
How do you capture fine details like mold and wear patterns?
Insurance adjusters and serious buyers want to see the flaws. A pristine photo that hides water damage or tape crinkle will come back to haunt you—either as a denied claim or a negative review. The trick is controlled depth of field and magnification.
For condition shots, get close. A macro lens (or your phone's macro mode) lets you fill the frame with the spine of a cracked case or the oxidation on a tape reel hub. Shoot at f/8 or higher if your camera allows it; you want enough depth of field that the entire defect is sharp, not just the front edge. If you're using a phone, tap to focus on the flaw itself, then steady your hands—or better, use a small tripod.
Shoot multiple angles of the same defect. One straight-on shot establishes location; a side-angle shows depth. For tape mold (the white, powdery nightmare that spreads between spools), photograph the window from multiple angles so the adjuster can see it isn't just dust. Include a macro of the affected tape edge if you've opened the shell.
Scale helps. Drop a coin or ruler next to small defects so viewers understand size. A 2mm crack looks catastrophic in a tight macro—context keeps you honest and prevents disputes. For museum-standard documentation techniques, the Northeast Document Conservation Center recommends including color reference cards in scientific photography. You don't need to go that far for insurance, but the principle applies: give viewers reference points.
Which backgrounds and settings keep your photos professional?
Your kitchen counter with yesterday's mail in frame says "I don't take this seriously." Buyers and insurers both respond to clean, neutral backgrounds that don't compete with the subject. White, gray, or black seamless paper works best—choose based on your item's color. Black shells on black paper disappear; white cases on white blow out. Match contrast, not color.
A sheet of poster board curved into an "L" shape creates an infinite backdrop with no horizon line. Place your cassette near the curve so shadows fall behind the object, not beneath it. This "seamless" look takes thirty seconds to set up and improves your images from amateur snapshots to catalog-worthy documentation.
Keep ISO low (100-400 on most cameras) to minimize grain. Grain obscures fine details like hairline cracks in plastic or faint print on J-cards. If you're hand-holding in dim light, your camera cranks ISO automatically—use that tripod. Sharp and slightly underexposed beats bright and noisy every time. You can brighten shadows in editing; you can't un-blur camera shake.
Shoot in RAW format if your camera supports it. JPEGs throw away data during compression, and that lost information might include the subtle gradations in a faded J-card or the true color of yellowed tape. RAW files preserve everything, giving you flexibility to correct exposure or white balance after the fact without destroying image quality. Most insurance documentation doesn't need RAW, but for high-value items—first pressings, signed copies, rare decks—shoot RAW and keep the files archived.
How should you organize and store your documentation?
A thousand photos on your phone, deleted when storage runs low, won't help when the basement floods. Create a system before you need it. I organize by acquisition date: folders named "2024-03-" for each month, with subfolders for individual purchases. Each folder contains a "master" shot (full front), "details" (spine, back, defects), and "context" (scale reference, serial numbers on decks).
Back up to three locations. Local external drive, cloud storage (Google Photos, iCloud, whatever), and one offline copy. Yes, this sounds paranoid. So does every collector who lost their documentation in the same fire that took their collection. Cloud services compress images—keep uncompressed originals on that external drive for high-resolution inspection if needed.
Rename files descriptively. "IMG_4739.jpg" tells you nothing in six months. "sony-wm-d6c-serial-28471-front.jpg" is self-documenting. This matters when you're scrolling through thousands of images trying to find proof that your Professional Walkman had clean battery contacts before the buyer damaged it. Consistent naming also makes your collection searchable—you can find every photo of Type II tapes with a simple file search.
For insurance riders on high-value collections, ask your agent what they need. Some want dated photos with newspapers visible (yes, still a thing—proves when the photo was taken). Others accept digital metadata. Create a spreadsheet cross-referencing file names, purchase dates, prices paid, and current estimated values. Update it quarterly. The American Collectors Association offers guidelines for documenting valuables that apply directly to media collections.
What's the best way to batch-process large collections efficiently?
Shooting five hundred tapes individually sounds like torture because it is. Set up an assembly line. Position your light tent or backdrop station, place a tape, shoot front/spine/back/defects, rotate. Don't chimp (review) after every shot—trust your setup and keep moving. A rhythm of thirty seconds per tape gets you through a hundred cassettes in under an hour.
Use a tethered shooting setup if you have the gear. Camera connected to laptop, images appearing on screen immediately. You catch focus errors or glare issues in real-time instead of discovering them during a hundred-tape editing session. Canon, Nikon, and Sony all offer free tethering software; Adobe Lightroom handles tethering for most major brands if you already subscribe.
For phone shooters, apps like Microsoft Lens or Adobe Scan auto-crop and correct perspective, but use them carefully. Aggressive auto-correction can hide case damage by straightening edges that aren't straight. Review each processed image at 100% zoom before accepting the crop. Better to spend an extra two seconds per photo than to discover your "documentation" erased the evidence of a cracked hinge.
Edit for accuracy, not beauty. Bump exposure if you underexposed, correct white balance if the lights ran warm, sharpen slightly if the focus is soft. Don't remove defects, enhance colors beyond reality, or clone out dust. Your goal is a photograph that would hold up in small claims court—not one that belongs on Instagram. If you wouldn't want a buyer seeing the unedited version, you shouldn't be selling the item.
Catalog everything the moment you finish shooting. Memory fades, and "that Maxell XLII from the Kensington flea market" becomes "some chrome tape I think I bought last summer?" while the photos sit unlabeled. The hour you spend organizing today saves days of detective work when you need to prove provenance, file a claim, or verify what you actually own before a big purchase. Your future self—the one dealing with the water damage, the disputed sale, the estate valuation—will thank you. Probably with a really nice bottle of wine, because you saved them from a nightmare.